
In this article, we will analyze the generation of a JWT token with the possibility of blacklisting it using an empty project as an example, and we will also test the result using Postman.
Briefly about JWT
JSON Web Token (JWT) is a JSON object that is defined in the open standard RFC 7519. It is considered one of the secure ways to transfer information between two parties. Its main feature is that all the necessary authentication data is stored in the token itself. It consists of 3 main parts: header, payload and signature. Header is a JSON object that contains information about the token type and encryption method:

Payload usually stores the user ID, the lifetime of the token, or any other information at the discretion of the issuer. However, there are reserved field names, and it is not recommended to change their purpose:
- iss: a string with the unique identifier of the party generating the token.
- sub: a string that is the unique identifier of the party about which information is contained in this token (subject).
- aud: an array of case-sensitive strings or a URI that is a list of the recipients of this token.
- exp: A time in Unix Time format that determines when the token will become invalid (expiration).
- nbf: opposite to the exp key, this is a Unix Time that determines when the token will become valid (not before).
- jti: a string that specifies the unique identifier for this token (JWT ID).
- iat: a time in Unix Time format that specifies when the token was created.
Signature is formed as follows:
1. Header and Payload are converted to base64 format.
2. Next, they are connected in one line through a dot.
3. According to the algorithm specified in the header, the received string is hashed based on the secret key.
The result of this algorithm is a signature. To get the JWT itself, you need to connect the header, payload and signature through the dot.
Authentication through JWT.
Typically, a user receives a JWT upon registration or first login. They save it on their device and, on subsequent calls to the API, pass this token with all requests. As a general rule, the token is placed in the request header. Having received a token, the application first checks its signature. After verifying that the signature is valid, the application extracts information about the user from the payload part and authorizes the user based on it.
Token lifetime
The lifetime of the token is a very important point when using JWT. There is no universal answer to this question, it all depends on the service. However, 2 points must be taken into account:
1. If the token lifetime is too long, it can cause security issues. For example, if an attacker manages to compromise a user’s token, they can use it until its lifetime expires.
2. A short token lifetime can lead to excessive load on the server, as the user will have to constantly refresh the old token (request a new one)
Hence the need to give the user an opportunity to reset all their tokens. For example, to give them the opportunity to change the password or log out from all devices if the token is compromised by an attacker.
There are several ways to revoke existing tokens, such as issuing tokens based on a unique user ID, or creating a blacklist for issued tokens.
Let’s take a look at the example about how to blacklist tokens on Django using the django rest framework and the Simple JWT library. Note that the Simple JWT library immediately provides us with a convenient Black List application that we will use.
Initial project setup
Let’s create an empty project with the django-admin startproject jwt_auth_project command. Let’s immediately create an application for working with users with the python manage.py startapp users command and register it in INSTALLED_APPS in the settings.py file:

Let’s create a virtualized environment, install the djangorestframework and djangorestframework-simplejwt libraries and write in the settings.py

Set permissions only for authenticated users in REST_FRAMEWORK and specify the class provided by the simplejwt library as the authentication backend.

The settings for simplejwt are also written in the settings.py file. In this article, we will not go into detail about each of them, as they are all described in detail in the documentation. Note that we chose 5 minutes for the token lifetime, and 2 days for the refresh token.
After that, we should update INSTALLED_APPS:

In the users application, we will create a urls.py file and register it in the jwt_auth_project/urls.py file:

Next, we need to write a custom manager for the future user model. In the users application, create a managers.py file and type the following code:

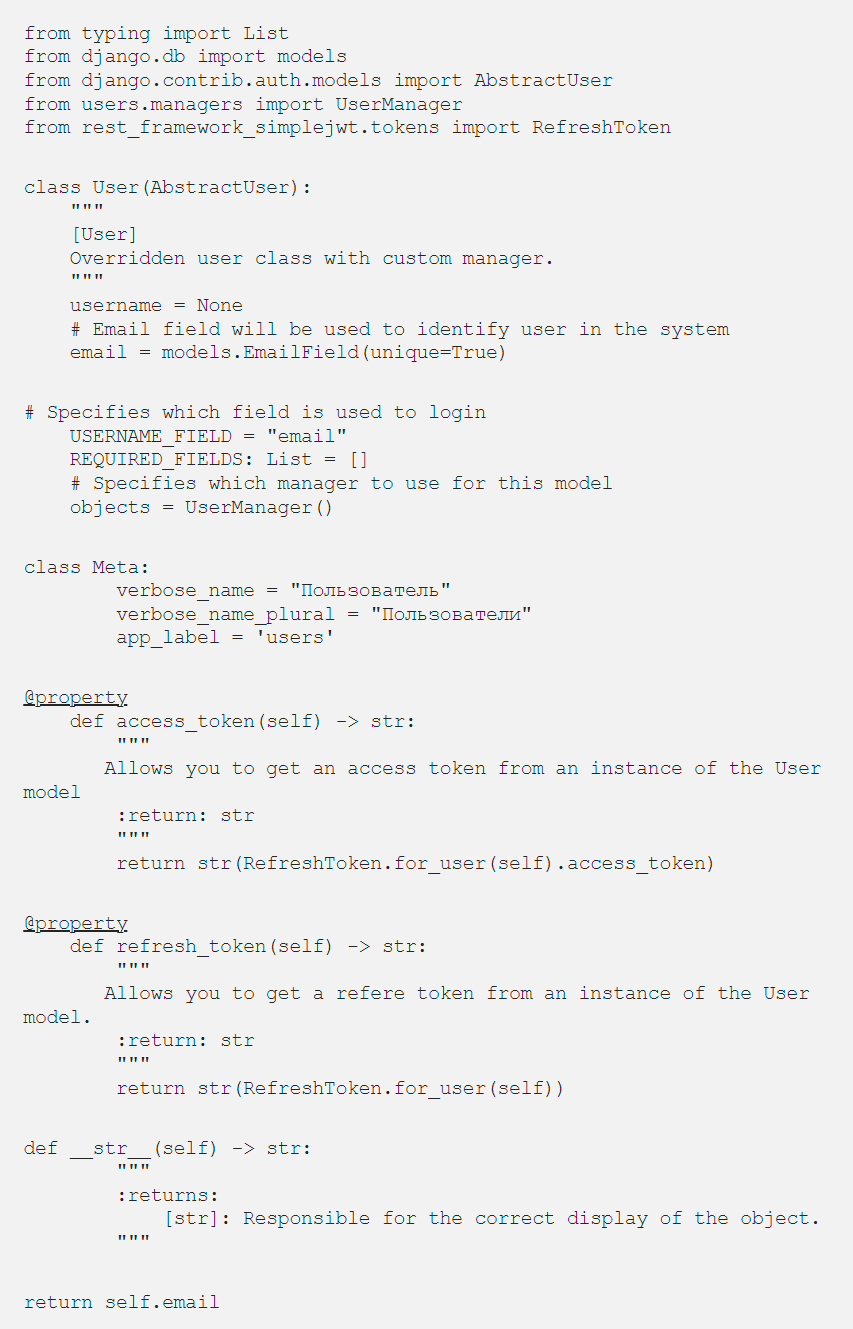
Now we can create our own user model in the users/models.py file:
The next step is to tell Django which user model to use for authentication. To do this, write the following line in the settings file:

Now you can start the server with python manage.py runserver create and run migrations with python manage.py makemigrations and python manage.py migrate. After that, the necessary tables for further work will be created in our database.
Receiving tokens, user registration, user information
At this stage, we are all set to write the main API points. Let’s create a users/serializers.py file and write the main serializers there:

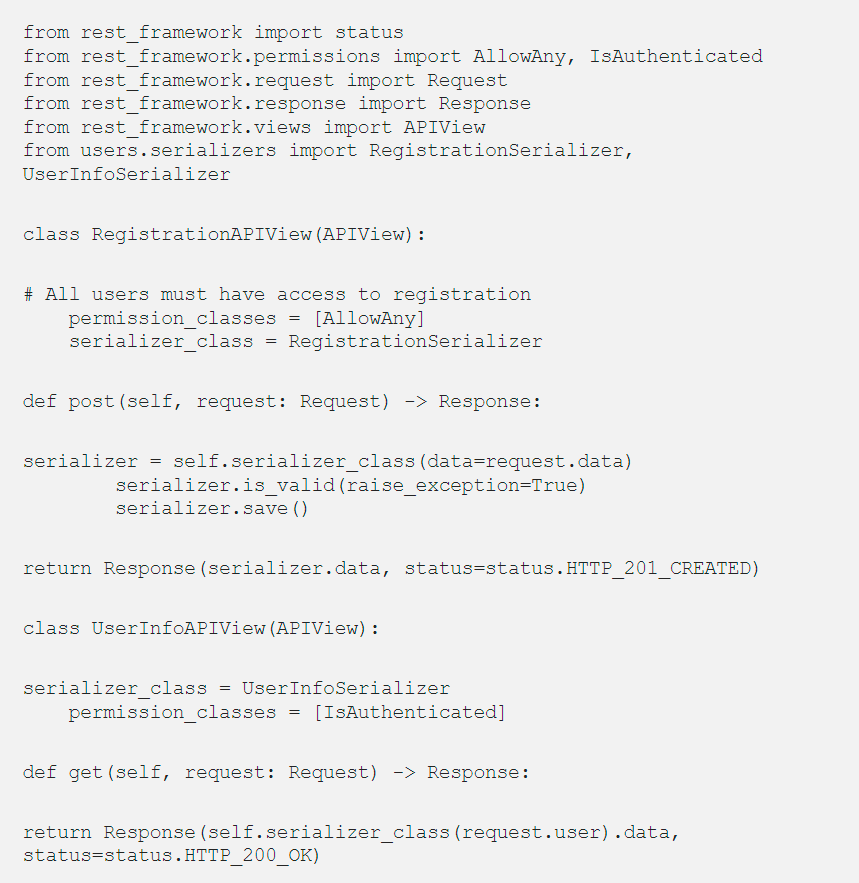
After that, in the users/views.py file, we will write a view for registering and returning information about the user:
Now we need to define the routes for our views in the users/urls.py file:

Note that the rest_framework_simplejwt library provides us with views for obtaining a token and a refresh and there is no need to write them manually.
Adding existing tokens to the “Black List”
Now the user can register in our application and get information about themselves. What is left for us to do is to give them the opportunity to log out from all devices (blacklist the tokens). The simple_jwt library provides us with two models, OutstandingToken and BlacklistedToken. We will use them to blacklist tokens.
To do this, let’s write another view in the users/views.py file:

And register it in users/urls.py:

Testing the resulting API with Postman
Now we can test the resulting API using Postman. First, we need to send the following request:
Note that because we defined access_token and refresh_token as dynamic properties in the User model and specified them in the serializer, we do not need to additionally request them after registration.
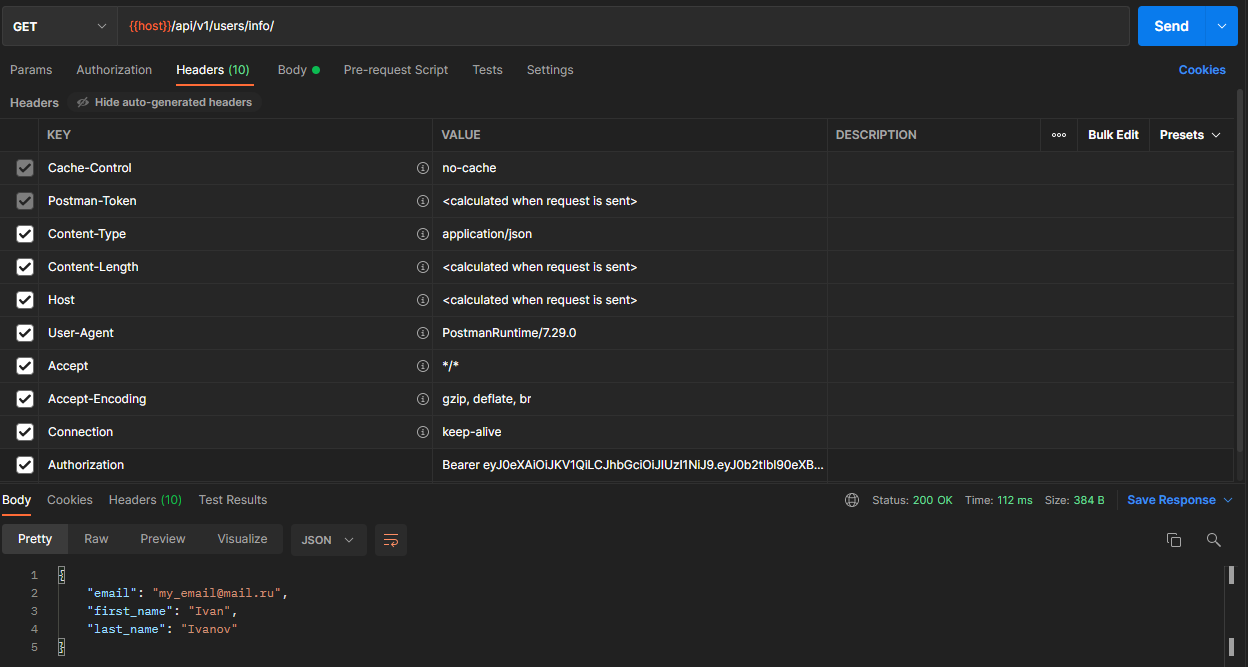
After registration, the user can get information about their account. For this, the Authorization header with the value Bearer {access_token} must be added to the request:
Read also on Medium